How to Improve Site Security on Shared Hosting
Starting a new website is an exciting venture. You have chosen your domain name, picked a beautiful theme, and perhaps most importantly, found a hosting plan that fits your budget. For many beginners and small business owners, shared hosting is the logical first step. It is affordable, user-friendly, and easy to set up.
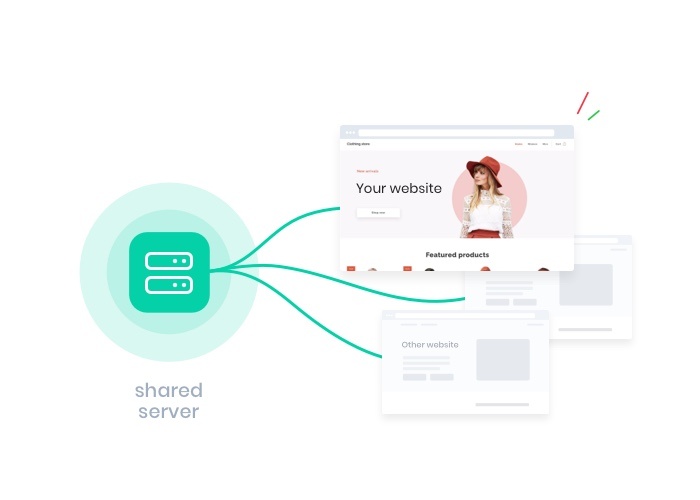
However, saving money on hosting should not mean compromising on safety. While shared hosting is an excellent entry point, it comes with unique risks that differ from dedicated servers or Virtual Private Servers (VPS). Think of shared hosting like living in a large apartment block. You have your own private flat, but you share the main entrance, the corridors, and the plumbing with hundreds of other residents. If one neighbour leaves the main door propped open, the security of the entire building is compromised.
This does not mean shared hosting is inherently unsafe, but it does require a proactive approach to lock down your digital property. Security breaches can lead to lost data, damaged reputation, and significant downtime. Fortunately, you do not need to be a cybersecurity expert to protect your website from hackers.
In this guide, we will explore practical, actionable steps to tighten your website security on a shared server. We will cover everything from basic password hygiene to technical file permissions, ensuring your site remains a safe destination for your visitors.
What Is Shared Hosting and Why Security Matters
To understand what is shared hosting, you must first understand how servers operate. In a shared hosting environment, a single physical server houses hundreds, sometimes thousands, of different websites. These sites share the server’s resources, including the CPU, RAM, and storage space. This resource sharing is what makes the hosting plans so affordable.
While this model is cost-effective, it introduces specific shared hosting security risks. The primary concern is the “bad neighbour” effect. If a website on the same server as yours is poorly secured and gets infected with malware, it can potentially strain the server’s resources, causing your site to slow down or crash. In more severe (though less common) cases of server misconfiguration, a breach in one account could theoretically be used to pivot to others on the same machine.
Most reputable hosting providers implement “cage” technology to isolate accounts from one another, but no system is impenetrable. Furthermore, because shared servers host so many beginner websites, they are often prime targets for automated bot attacks looking for easy vulnerabilities. Understanding that you are in a shared environment is the first step toward better vigilance. You are responsible for locking your own doors and windows.
Most Common Security Threats on Shared Hosting
Before we dive into the solutions, it is helpful to identify what exactly you are fighting against. Website hacking risks generally fall into a few specific categories when dealing with shared environments.
Malware Infections
Shared hosting malware is a pervasive issue. This malicious software can be injected into your site files to steal customer data, deface your homepage, or use your site to send spam emails. Often, malware enters through outdated plugins or weak passwords. On a shared server, if the host fails to isolate accounts properly, malware can spread from one infected site to others on the same directory structure.
Brute Force Attacks
This is a method where hackers use automated software to guess your username and password combination. They will try thousands of combinations per minute until they crack the code. Since shared servers host many sites, attackers often spray these attacks across the entire server IP address, looking for any site with weak credentials.
Cross-Site Contamination
This is the unique risk of shared hosting. If a hacker gains root access to the main server through a vulnerability in another user’s website, they might bypass standard security protocols. While hosting companies work hard to prevent this, it highlights the importance of adding your own layers of security rather than relying solely on your host.
Enable SSL and HTTPS to Protect Data
If your website URL still starts with “HTTP” instead of “HTTPS,” you are flagging your site as insecure to every visitor and search engine. Enable HTTPS website protocols is no longer optional; it is a necessity.
SSL (Secure Sockets Layer) creates an encrypted link between your web server and your visitor’s browser. This ensures that any data passed between the two—such as login details, credit card numbers, or contact forms—remains private and integral. Without SSL, this data is sent in plain text, meaning anyone intercepting the traffic can read it.
Most modern shared hosting providers offer free SSL certificates via Let’s Encrypt. To install SSL on shared hosting, you usually only need to log into your hosting control panel (like cPanel) and find the “SSL/TLS Status” or “Let’s Encrypt” icon. With a few clicks, you can issue a certificate.
Once installed, ensure your site forces HTTPS. This means if someone types “http://yourdomain.com“, they are automatically redirected to the secure “https” version. This simple step boosts your SEO rankings, builds trust with users (giving you that reassuring padlock icon), and secures data transmission.
Use Strong Passwords and Two-Factor Authentication
It sounds incredibly basic, but the vast majority of successful hacks occur because of weak credentials. Using “Password123” or using the same password for your email, banking, and hosting account is a recipe for disaster.
To ensure a secure website login, you must use complex, unique passwords for every access point. This includes your hosting dashboard, your FTP accounts, your database, and your Content Management System (CMS) like WordPress. A strong password should be at least 12 characters long and include a mix of uppercase letters, lowercase letters, numbers, and symbols. Since remembering these is impossible, use a password manager like 1Password or LastPass.
However, a strong password alone is often not enough. You should implement two factor authentication hosting wherever possible. Two-Factor Authentication (2FA) adds a second layer of defence. Even if a hacker steals your password, they cannot access your account without the temporary code sent to your mobile device or authentication app. Check if your hosting provider supports 2FA for the main control panel, and install a plugin to enable 2FA on your WordPress login screen.
Keep Software Updated (WordPress, Plugins, Themes)
If you are using a CMS like WordPress, you are using software that is constantly being probed for weaknesses. Developers release updates not just to add new features, but to patch security holes that hackers have discovered. If you fail to update WordPress security patches, you are leaving the door wide open.
Keep website software updated by regularly checking your dashboard. This applies to three distinct areas:
- Core Installation: The CMS itself (e.g., WordPress, Joomla, Drupal).
- Plugins: The functional add-ons you have installed.
- Themes: The design templates you are using.
On shared hosting, outdated software is the leading cause of infection. Hackers use bots to scan the web specifically for sites running old versions of popular plugins. Once found, they exploit the known vulnerability to inject code.
To mitigate this, enable auto-updates for minor releases. For major updates, perform a backup first, then update immediately. Furthermore, audit your site periodically. If you have plugins that you are no longer using, delete them entirely. A deactivated plugin can still contain vulnerable code that hackers can exploit.
Install Security Plugins and Firewalls
You cannot be online 24/7 watching your website, but a security plugin can. If you are on WordPress, installing a comprehensive security suite is one of the most effective website protection tips available.
The best security plugin for WordPress will offer a range of features, including malware scanning, login protection, and activity logging. Popular options like Wordfence, Sucuri, or iThemes Security are excellent choices. These tools act as a guard dog, alerting you if files have been changed or if someone is trying to guess your password.
Crucially, you should look for a solution that includes a Web Application Firewall (WAF). Website firewall protection works by filtering the traffic coming to your site. It identifies malicious requests—such as SQL injections or cross-site scripting attacks—and blocks them before they even reach your server. On shared hosting, where you have less control over the server-level firewall, having an application-level firewall is a vital line of defence.
Set Correct File Permissions and Secure FTP Access
This section is slightly more technical but essential for file permission security. File permissions tell the server who is allowed to read, write, or execute the files that make up your website.
If permissions are too loose (e.g., set to “777”), anyone can edit your files and inject malicious code. If they are too strict, your website might break because it cannot access its own scripts. Generally, the standard recommended permissions are:
- Directories (Folders): 755
- Files: 644
- wp-config.php (configuration file): 600 or 440 (highly restrictive)
You can check and change these using the File Manager in your hosting control panel.
Additionally, pay attention to how you upload files. Many users rely on standard FTP (File Transfer Protocol). However, standard FTP sends your username and password in plain text. To ensure secure FTP access, always use SFTP (Secure File Transfer Protocol). SFTP encrypts the connection, ensuring that if a hacker is snooping on the network, they cannot steal your credentials. Most shared hosts support SFTP; you simply need to change the port number and protocol in your FTP client (like FileZilla).
Enable Automatic Backups for Recovery
Imagine waking up to find your website has been deleted or completely defaced. Without a backup, you are back to square one. This is why an automatic website backup strategy is your ultimate safety net.
While many shared hosting providers claim to take daily backups, you should never rely on them as your sole source. If the server fails catastrophically, their backups might disappear along with your live site. You need an independent backup solution.
Use a plugin or a third-party service to schedule daily or weekly backups of your database and files. Crucially, store these backups off-site. Do not save the backup file on the same server as your website. Send it to a cloud storage service like Google Drive, Dropbox, or Amazon S3.
If the worst happens, having a clean, recent backup allows you to restore hacked website data within minutes rather than weeks. It turns a potential business disaster into a minor inconvenience.
Monitor Your Website for Suspicious Activity
Security is not a “set and forget” task. You need to know what is happening on your site. Website security monitoring involves keeping an eye on uptime, file changes, and traffic spikes.
If your website suddenly goes offline, it could be a server issue, or it could be a DDoS attack. Tools like UptimeRobot can send you an email the moment your site goes down.
Furthermore, use malware detection tools or your security plugin to scan your files regularly. Be alert to subtle signs of a compromise, such as:
- New user accounts appearing in your dashboard that you did not create.
- Pop-ups or redirects sending visitors to other websites.
- A sudden drop in site speed.
- Warnings from Google Chrome stating “The site ahead contains malware.”
Early detection is key to limiting the damage. The sooner you know about a breach, the faster you can lock down the site and restore a backup.
When Should You Upgrade from Shared Hosting?
Shared hosting is fantastic for getting started, but there comes a point where your site may outgrow it. Recognising this moment is a security measure in itself. As your traffic grows, you become a bigger target, and the limitations of a shared environment become more apparent.
You should consider an upgrade from shared hosting to a VPS (Virtual Private Server) or a Managed WordPress Hosting plan if:
- Traffic volume is high: Shared servers have resource limits. If you exceed them, your host might take your site offline to protect other users.
- E-commerce growth: If you are processing a high volume of credit card transactions, the isolated environment of a VPS offers better compliance and security.
- Performance issues: If your site is sluggish due to other users on the server (“noisy neighbours”), it affects user experience and security.
VPS hosting security is superior because your account is virtually isolated. You have your own dedicated resources and often a dedicated IP address, eliminating the risk of cross-site contamination and giving you root access to configure custom firewalls and security rules.
FAQ – Shared Hosting Security
Here are answers to the most frequent questions regarding securing shared hosting environments.
Q1: Is shared hosting safe for websites?
Yes, shared hosting is generally safe for blogs, portfolios, and small business sites, provided you choose a reputable host and implement the security measures outlined in this guide. However, it is less secure than VPS or dedicated hosting due to the shared nature of the server.
Q2: How can I secure my website on shared hosting?
Start by using strong, unique passwords and enabling 2FA. Install an SSL certificate, keep all software and plugins updated, use a security plugin with a firewall, and ensure you have off-site backups running automatically.
Q3: Can shared hosting get hacked easily?
Shared hosting can be more vulnerable to certain types of attacks, such as cross-site contamination, where one infected site affects others. However, most hacks on shared hosting are due to user error (weak passwords, outdated plugins) rather than the hosting platform itself.
Q4: Do I need SSL on shared hosting?
Absolutely. SSL is essential for encrypting data, protecting user privacy, and improving Google search rankings. Most shared hosts provide SSL certificates for free.
Q5: What is the best security plugin for shared hosting?
There are several excellent options. Wordfence, Sucuri, and iThemes Security are highly rated. Look for a plugin that offers a Web Application Firewall (WAF), malware scanning, and login security features.
Q6: When should I move from shared hosting to VPS?
You should upgrade when your site traffic increases significantly, if you notice consistent performance drops, or if you begin handling sensitive customer data that requires a higher level of isolation and server control.
Conclusion
Securing a website on a shared hosting plan does not require a degree in computer science. It simply requires diligence. By understanding the inherent risks of a shared environment and taking proactive steps—like enforcing strong passwords, automating updates, and setting up robust firewalls—you can drastically reduce the likelihood of a successful attack.
Remember, cyber security is an ongoing process, not a one-time fix. Hackers are constantly evolving their methods, so your defences must evolve too. Do not wait for a breach to happen before you take action. Audit your site today: check your backups, update your plugins, and ensure your SSL is active.
If you find that your website has outgrown the capabilities of shared hosting, or if you simply want greater peace of mind, consider upgrading your hosting plan. Your digital presence is valuable—protect it accordingly.